
So, you have a great idea for a product, an electronic device or software application… where to from there? If you’ve gathered the essential ingredients from step 1 and you are ready to get started, the very first thing to decide is what, exactly, you’ll have on hand at the end of the project:: a simple proof of concept, a functional prototype or production-ready design.
What to aim for
The three core components described as essential ingredients (concept, audience and function) encapsulate all the important information required to move from abstract notion to a real functioning circuit, firmware or software application. There are a few additional decisions to make about goals and priorities, before a project can get off the ground.
The first choice when approaching development involves determining your level of certainty about feasibility and market interest, and using that to decide how far you want to go. This boils down to choosing if you want to build a:
- proof of concept: when you just want to see if the idea is feasible and meets your needs;
- functional prototype: when you’re fairly certain it works, but want to try it out to see how it can be improved or to demonstrate it to investors, etc. ; and
- production-ready system: something that, after beta testing and minor tweaks, would be ready for immediate mass production and distribution.
Proof of concept
Because of uncertainties about the function, utility or even feasibility of your concept, you may want to go for a proof-of-concept development. The idea here is to have something ready as soon as possible, and at the lowest cost.
 In these cases, using off-the-shelf (COTS) components wherever we can (e.g. and Arduino or some existing hardware module for wireless communication, etc) and open source code libraries will get the ball rolling and quickly let you know if the idea is worth pursuing, without a huge investment in development.
The upsides of aiming for a proof of principle are:
- speed: it’s built like a LEGO system, using existing parts and code, so it is ready quickly; and
- low development cost: there’s little or no circuitry to design, fabricate and assemble so dev time is short;
The main downsides associated with this approach are:
- high per-unit cost: using COTs modules is more expensive than custom circuitry, so you don’t want to produce many units this way;
- deferred development: if you choose to go ahead and develop the system further, some of the work already performed probably needs to be rethought/refactored/redone for the final implementation; and
- less precise model: the proof of concept may act like the final system is some regards, but it may not cover all use cases and it isn’t built like it would be in “real life” (it may be larger, more power hungry, less in a demonstrable state, etc).
Prototype
The prototype is a first pass at a real production system, an early version of a production design. It goes further than the proof of concept in that it will aim to support all of the final design’s capabilities and functions, while using software and components that can be included in a finished product without extensive (or, ideally, any) modification.
Design and testing of the prototype may begin by using off-the-shelf components, but will usually end with a customized circuit board and/or implementation in order to reduce unit costs, simplify production and/or make the entire device smaller and better integrated.
Compared to the proof of concept, this goal may take a bit longer and involve a greater investment in development, however the result is more concrete and usable that a simple answer to the “will this even work?” question.
The prototype is the first incarnation of your idea into the real world and gives you a true picture of how the device performs while providing the opportunity to test and demonstrate it’s use. Small production runs of prototypes can be handed to beta testers and demonstrated to potential investors. For hardware, this is also a good stage at which to try out various enclosures and interfaces for the device, by leveraging the power of 3D printed enclosures.
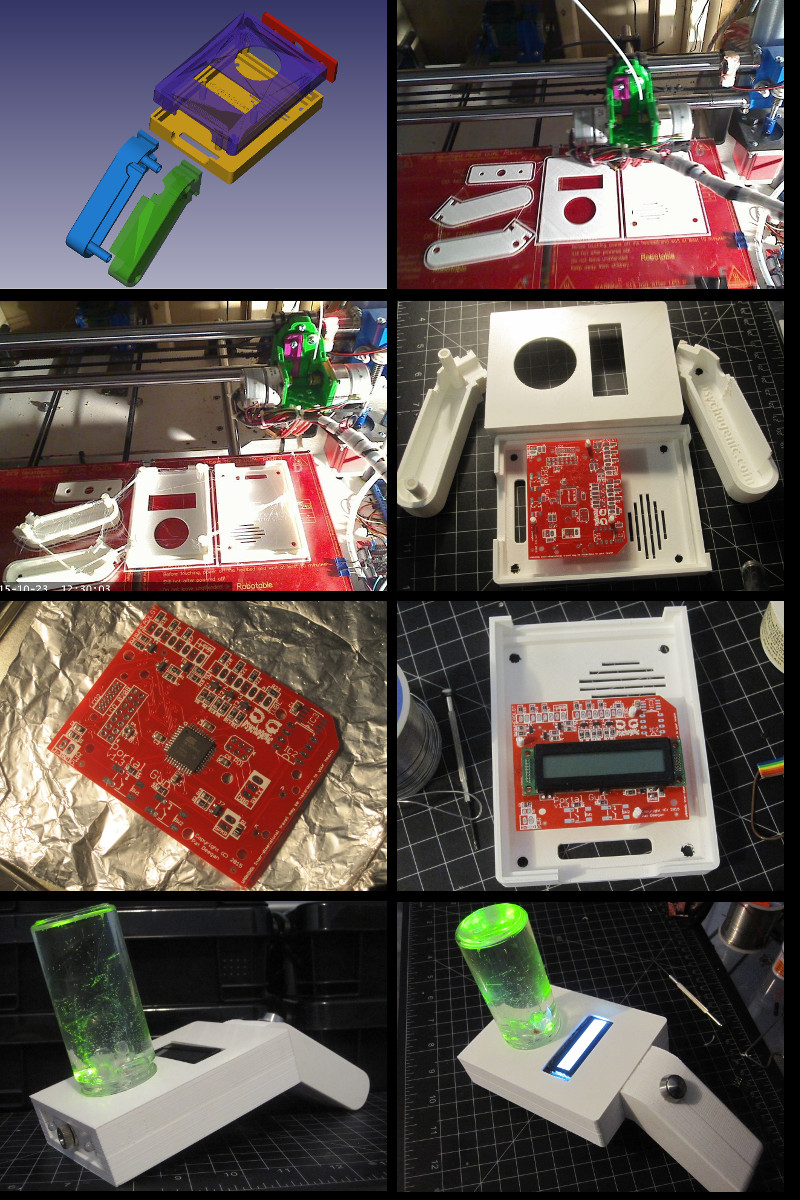
A prototype circuit and enclosure
Advantages of creating a prototype:
- complete test: a prototype does everything your finished product will do, and tells you everything about its performance and physical characteristics;
- usable: unlike some proof of concepts, the prototype is a single, integrated, system and can be manipulated by end users as intended;
- informative: the prototype includes all the hardware and software needed by a production device, so you have a good idea of how easy it is to produce and the components that will be required;
- closing in on production: though some adjustments may need to be made, for cost reasons or because of beta user feedback, the system is nearly production ready.
The downsides of a prototype implementation are:
- the complete development cycle is required (potentially involving part selection, circuit design, source code development, printed circuit board (PCB) layout and fabrication, assembly), so development costs are higher than for proof of principle;
- though less expensive, per unit, than a proof of concept using COTs components, production runs are still small so leveraging economies of scale is still out of reach;
- turn-around is slowed, because the development needs to include more steps;
Production ready design
Once a prototype has been tried out and perhaps improved in a few ways, and we’ve determined that everything required of the device is in place, it is possible to move forward and get ready for mass production. Hopefully, if this was the original goal, the previous stages have taken the desire to mass produce into account during part selection and design.
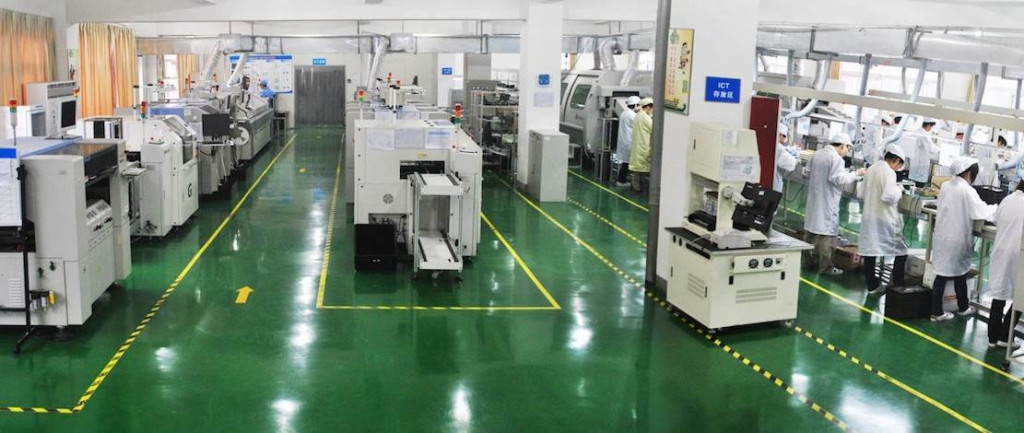
Still, when considering the production of a device in bulk, certain considerations must be accounted for, namely to make fabrication more cost effective. After the functional and interface of your invention have been created and tested, a careful look at which:
- parts;
- suppliers; and
- fabrication and assembly houses
to use, along with their capabilities, will inform decisions concerning final modifications to boards, part layout etc in order to make production efficient and cheap, without compromising quality and reliability of the system.
If mass production is your end goal but you have yet to produce a prototype with which you are fully satisfied, the best approach is to aim for a prototype but specify that it should be designed while keeping in mind that the hope is to manufacture the system in bulk.
The main downside here is that heightened attention must be paid to the part selection and design to ensure production can be automated and handled at low cost, which imposes additional constraints on the design and increases development fees. However the big advantage of completing this stage is that, on delivery, it’s as easy to make 10,000 units as it is to produce 10–and much cheaper, per device!\
Ready To Discuss
Now that you’ve defined your concept, described your users, laid out the function of your invention and decided whether you just want to try something out, need a few prototypes or want to be ready for mass production, then you are ready to work with a consulting team to make your vision a reality. All that’s left is to let your consultants know just what you need: the final part of this series goes over what to prepare for engineers and designers and what to expect of the development process.